Monday, September 21, 2015

What a year! Two studio moves and a year full of character building challenges later I am finally (hopefully) settled at last.  I have opened a small gallery in Country Village in Bothell, Washington and love, love, love my new space.  I also just wrapped up the second annual Hallowbaloo show and thought I would breathe some new life in my poor neglected blog by sharing some of the artwork I loved.  Hallowbaloo is an incredibly fun show to be part of and not only are the show owners a dream to work with but I really look forward to spending time with the other artists there.  I enjoy hearing what everyone is up to, taking in their advice and having some laughs.  I was apparently having such a good time chatting that I forgot to take actual photos of many of the things I loved so please forgive me artist friends if I do not have pics of your work to share here.

I had the opening table at the show.  This year my daughters were working at my gallery and could not come with me so this is why I am not actually in any photos.
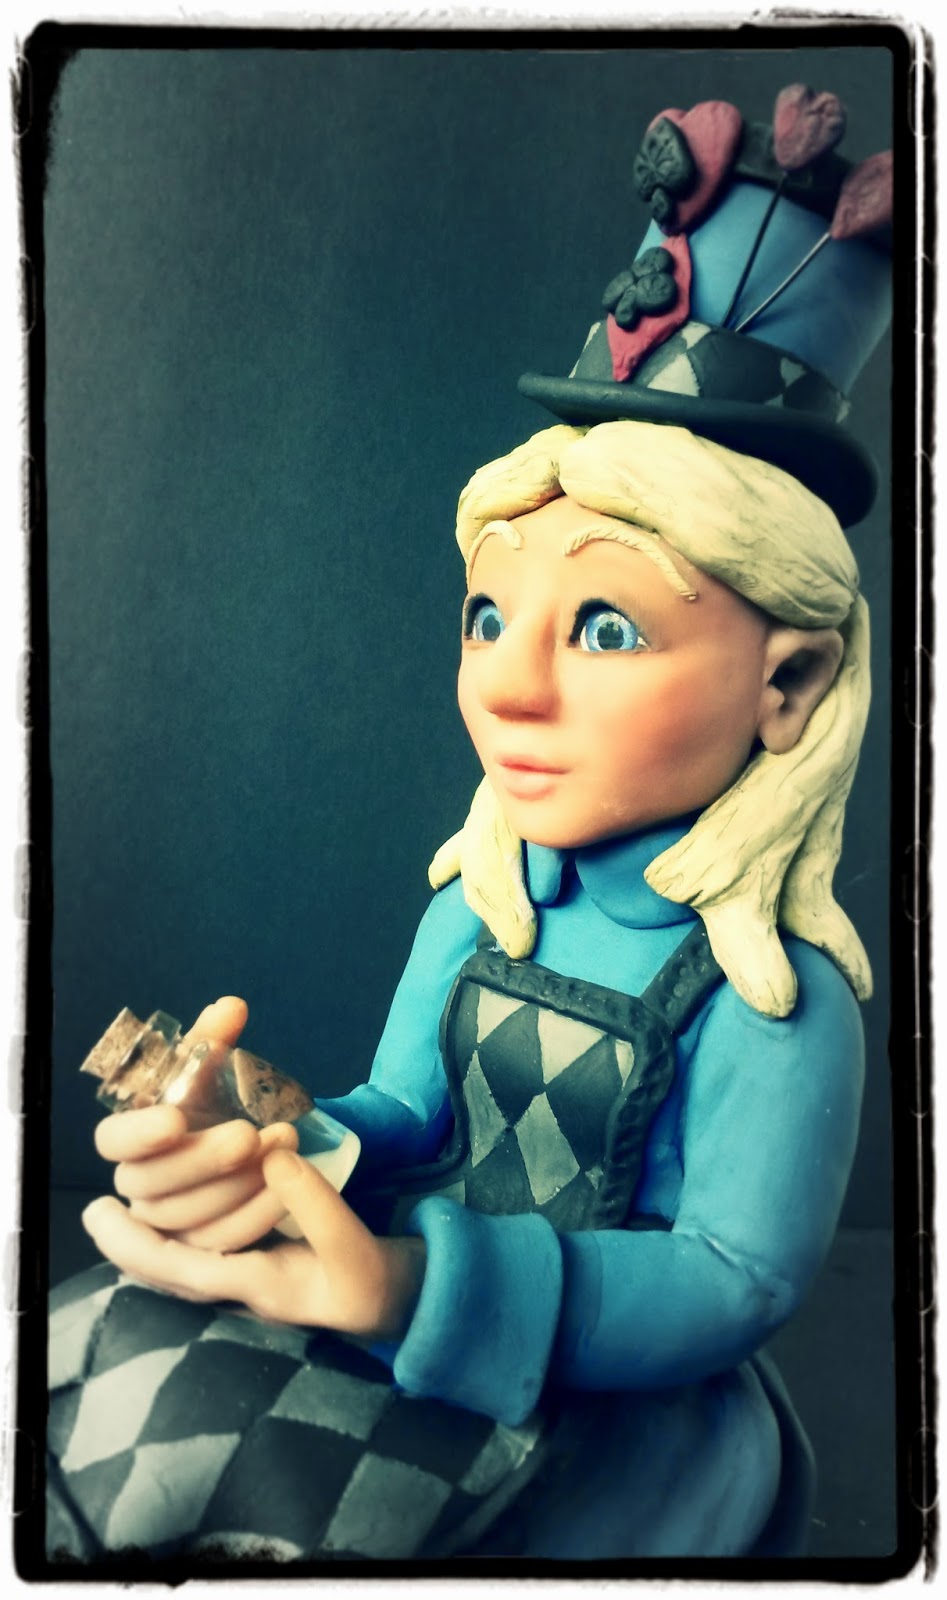
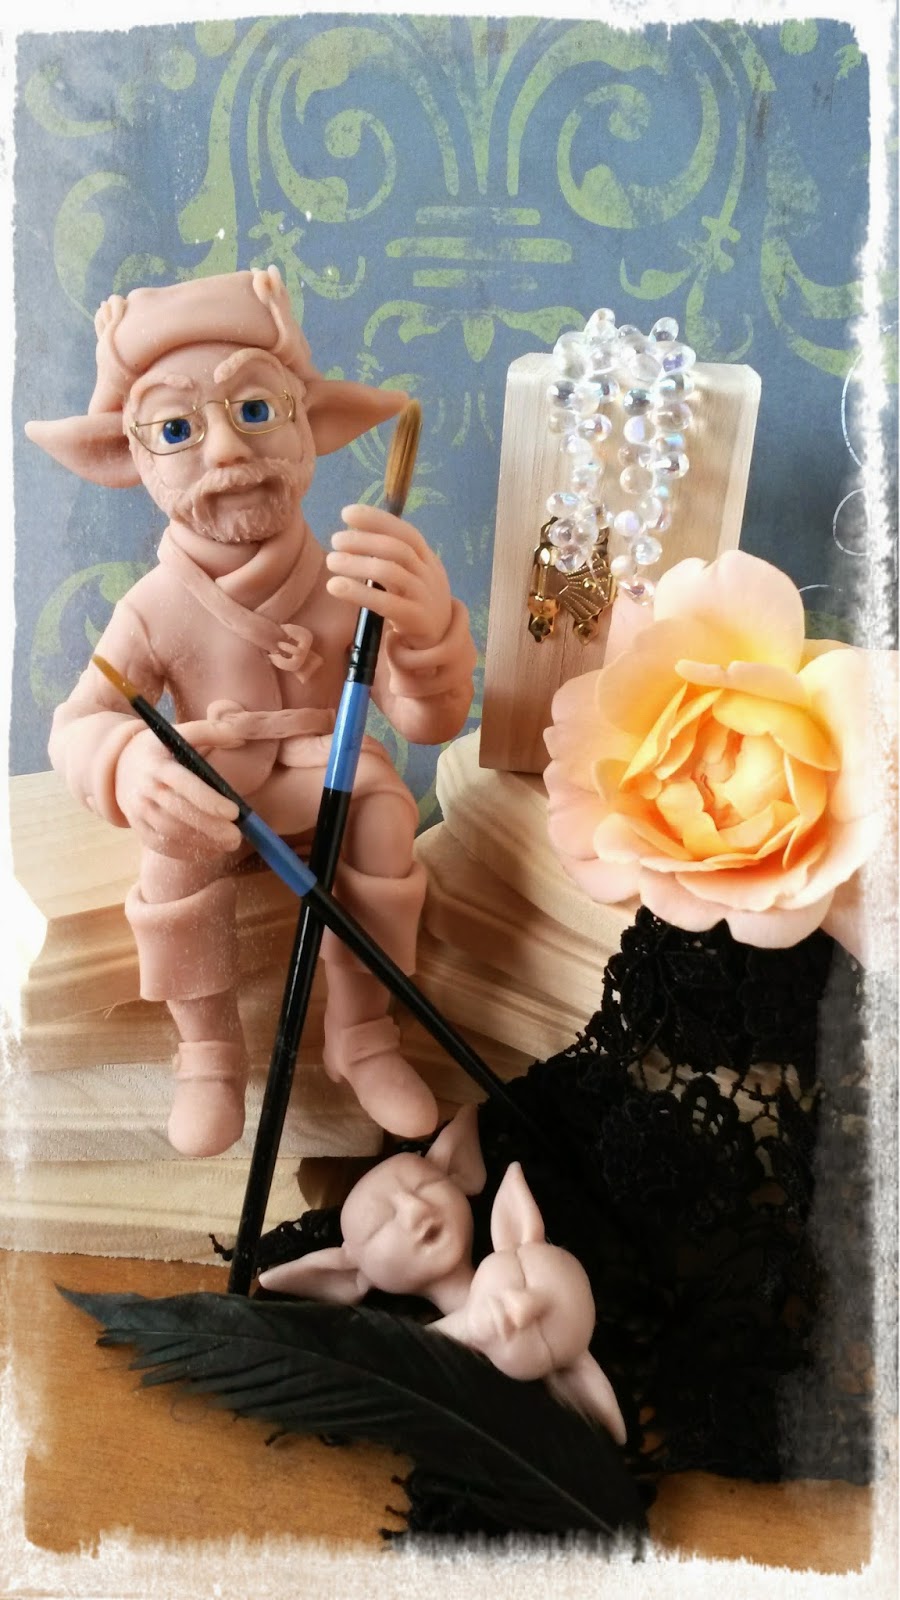
 Dolls by Marca

Margarita Castillo is one artist friend I always look forward to seeing.  We have chatted at shows from Philadelphia to Seattle and she is truly one of the nicest people I have ever known.  Her work is amazing too and I own several of her pieces.  This year she won an award for her beautiful display.  I will be taking notes and building a new display myself for next year's shows.
This lab rat by Pam Pontious at Pamda Bears was priceless. I love the steampunk flair and he was just the right amount of creepy and cute.
Keeping in the steampunk theme, Becky Federico's framed cats caught my eye. 
Normally clowns freak me out but something about this one in black and white with the goofy face and parasol by Robert Eberz of Grimm Grinz Studio won me over- no small accomplishment when it comes to clowns!  
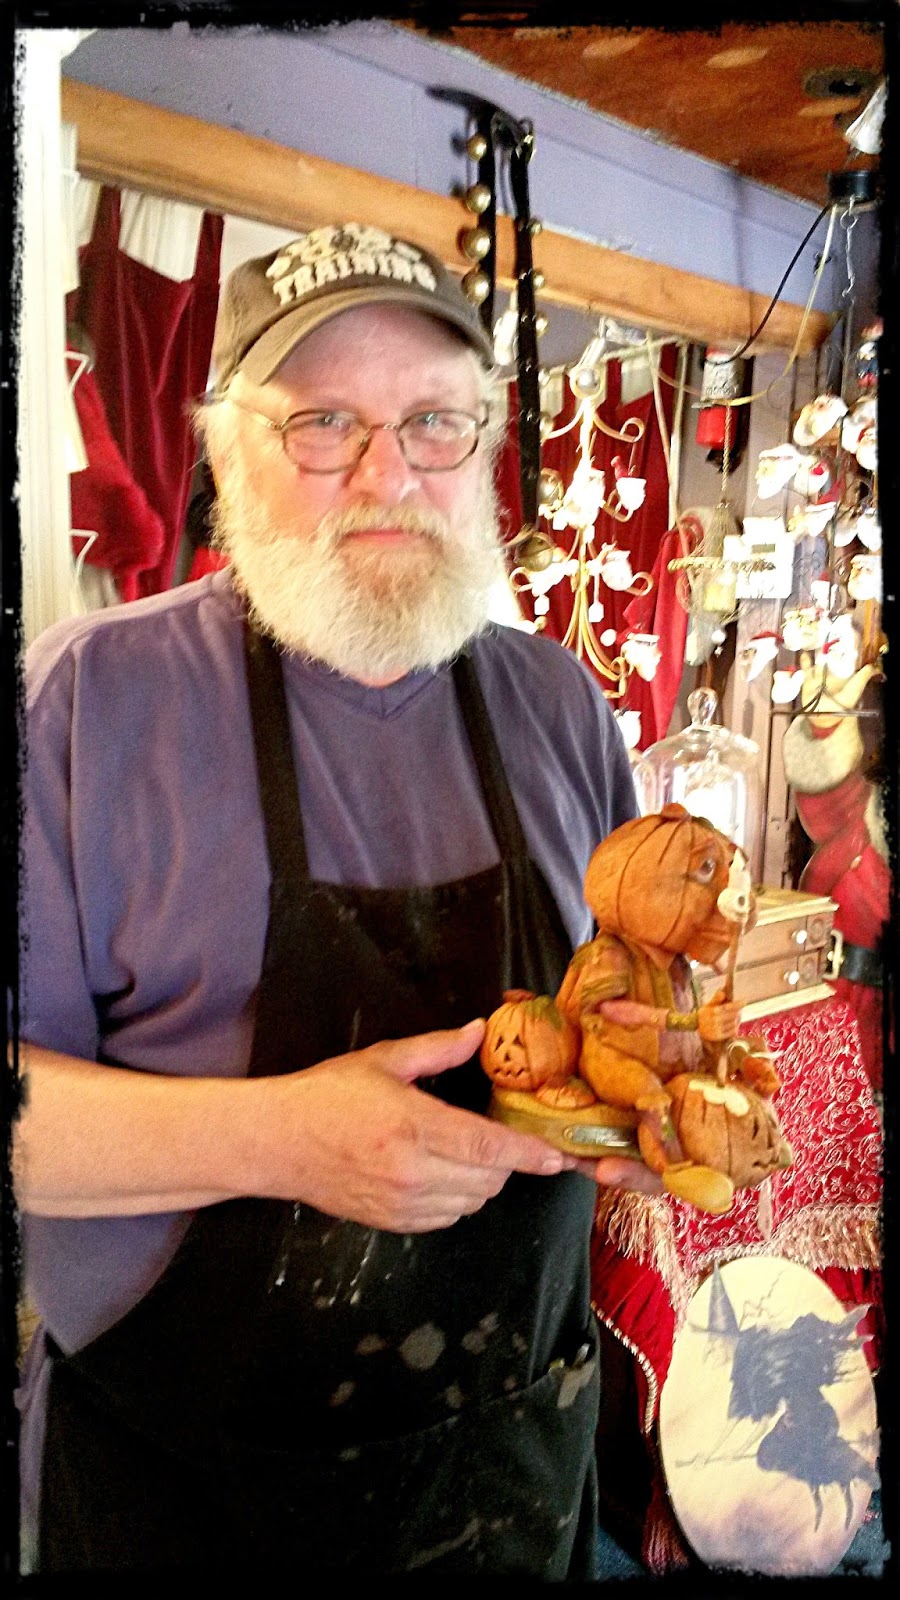
Last year I fell in love with the expressions on the faces of Sheryl Parsons' gourds.  This year she had this little guy I loved as well as a couple of owls that were calling my name.
If you have seen much of my work you know how much I love the Day of the Dead art.  Irene Lawson had a table full of intricately painted ceramics but this one with the ravens was my favorite.
I became an uber fan of Zombienose last year and came home with a print that hangs over my desk at home.  I still have anxiety about missing out on a piece he brought to Hallowbaloo last year and this year his amazing devil will be added to my wish list.  That face!
This amazing bird caught my eye before the show opened. I literally thought it was real for a second but it is sculpted out of leather!  Annie Libertini has a gifted eye and her masks are amazing.  Here she is cradling her bird.
And a close-up...

I will be looking forward to next year's Hallowbaloo and hope to see everyone return and a few of the more of those who could not make it this year.  If you are in the area and love Halloween art it is definitely worth checking out. For links to all of the artists above and those I missed please head over to the Hallowbaloo link www.thehallowbaloo.com.

I will have a few more Halloween pieces coming up and then dive right into the holiday season.  My long neglected blog should be kept alive and newly invigorated over the coming months!


Friday, November 21, 2014

Personalized Nutcracker Tutorial

Here is a fun holiday project you can make for yourself or as a gift.
I am always on the lookout for things to fix up, make over or personalize.  I was in a drugstore last week and came across these nutcrackers.  Nutcrackers have been made to be all kinds of things and make them perfect for gift-giving and collectinng.  They can become movie characters, sport figures, animals, or representatives of countries, hobbies and occupations.  They are the perfect item to personalize for your own holiday decor or to give as a gift.  In this tutorial I will transform a three-pack of small 3-inch nutcrackers and one large nutcracker with Creative Paperclay and some acrylic paints.  Here is a list of supplies to gather.
  • I package of Creative Paperclay
  • acrylic craft paint
  • paintbrushes
  • container of water
  • gesso
  • Fabritac or other basic glue
  • aluminum foil (optional)
  • varnish (optional)

Here are the small nutcrackers fresh out of the package. The first step is to rip off any ornamentation that is not desired, especially the hair.  Hair can usually be pulled off easily and saved to be replaced after you repaint your figure.
Press the Creative Paperclay onto the nutcrackers to form simple shapes for your desired themes.  Nutcrackers are usually stiff and have clean, simple shapes. In this example I chose a male and female gnome and a football player.  Once your new clothing is sculpted allow the figure to dry overnight.  When the figure is dry, lightly paint any areas that will need to be repainted with gesso.  In this case I covered the original uniforms and the female's face (since I didn't want her to have a mustache!).
Use your acrylic paints to paint the new clothing and faces.
Here are the newly transformed figures!  The gnomes will be handy gifts and the football player is now proudly representing my daughters' high school football team.
If you would like to tackle a larger project, this is a 14-inch nutcracker.  This fine gentleman was stripped down first and is on his way to an Alice in Wonderland makeover.
Here he is with all of his unnecessary items pulled off, ready to be transformed.
I pressed on a simple Mad Hatter style hat and bulked out his arms a bit.
I decided I wanted him to have a longer coat so I used aluminum foil to fill in some space so I would not have to use as much clay to lengthen the jacket.  I also wanted some more substantial looking boots.
Here is the new jacket and boots.  I allowed the nutcracker to dry overnight and painted any exposed paint with gesso.
Once the Creative Paperclay and gesso had dried, I painted the basic clothing.
Details make all the difference in the final piece.  In order to get a little more Alice In Wonderland feel, I added a bit of the Queen of Hearts, the Cheshire Cat's smile, some mushroom cap sleeves, some beaded hat pins, the "Eat Me" cake and "Drink Me" bottle, and a few of my favorite quotes.  You may add a protective coat of varnish to preserve your work, too.  I replaced the hair with a bit of new faux fur, but you should be able to reuse the hair you pulled off initially.

These are just a few ideas of what you can create.  You can transform your nutcracker to fit any person- think of their hobbies, interests, occupations, etc.  You may want a nutcracker to compliment your decor or have one that has been beaten up a little over the years that you want to make new again.  A little Creative Paperclay and paint can transform that dollar store or tired old nutcracker into something you can love for years to come!
Think big, be creative and Happy Holidays!

Tuesday, October 7, 2014

Witchy Tour of Artists

Just a quick note to share a blog hop that is going on with some amazing artists!  If you have the time to do a little blog cruising stop into the Witches of Giggleswick blog hop and enter their giveaway.  Their links are linked up in my favorite blogs to the right or start here at LeeAnn Kress' blog and get rolling!

Sunday, October 5, 2014

Halloween Ornament Recycling Project

My girls and I just decorated our house top to bottom for Halloween.  Part of that exciting day is pulling out all of our costumes and seeing what we have to work with.  It is always interesting to inspect the mangled remains of wigs that managed to look decent for one or two days of wear (if you didn't move too much and definitely did not try to brush it). But what can you do with them once they are matted and tangled?  I have the perfect project that will keep that wig out of the landfill AND give you some fun, recycled Halloween Shrunken Head ornaments for years to come!

Here is a list of items you will need

  • Halloween costume wig- the messier the better
  • Creative Paperclay 
  • acrylic paints in browns and black
  • paint brush
  • small bit of wire (or a paperclip) and wire cutters
  • scrap fabric (I rip woven cotton and cut strips of burlap, or raid discarded costume parts)
  • wooden beads
  • assortment of string, twine, raffia
  • scissors
  • Glue (I am using Fabri-tac for this sample and highly recommend it for this project)
  • about 12 inches of aluminum foil


  1.  Begin by scrunching up and shaping your aluminum foil into a rough head shape with a "neck" as shown in the photo.  The neck is important because you will be adding decorative elements later.
  2. My example is made of Creative Paperclay but you can use polymer clay as well. Cover the foil base with the paperclay and rough out a face.  The beauty of sculpting a shrunken head is that you do not have to worry about it being a perfect face.  In fact, the more lopsided, bumpy and odd it is the more character it will have!  If you want open eyes you can simply press black beads into your clay and roll clay eyelids over the top as shown in the photo on the left below.  I wanted mine to have eyes "sewn" shut so I covered the eyes and rolled small pieces of paperclay to look like stitches.
  3. Use a sculpting tool or toothpick to make holes in the lips and ears.  You can also add holes at the brows or insert a stick or broken toothpick through the nose.  Be sure the holes are large enough that you will be able to get your thread through them later.
  4. Cut about 2 inches of wire and twist into to form a loop on one end (as shown in the supplies photo).  You can also use half of a paperclip bent to a similar shape.  Insert into the top of the head. You will attach a string hanger to this later.
  5. Allow your head to dry completely.
  6. Once your head is dry you are ready to give this guy or gal some character!  Paint the head in your selected colors.  I am using a selection of browns and blacks for my example but you can really go crazy here- especially if you have some crazy wig colors, or try glow-in-the-dark paint!  Again, a rough paint job only adds to the rustic charm so don't worry about skill levels, just have fun.
  7. Once your paint is dry it is time to thread your chosen string through the holes in the face and ears.  Tie at least one knot to secure string before adding beads.  Use your imagination and remnants here-braid in raffia, tie in a feather, add a stray plastic spider, etc.
  8. To decorate the neck run some glue around the surface to secure your fabric to. Now take your ripped fabric and/or burlap and tie it to the neck.  You can also add more of your string or raffia here depending on the overall look you desire.
  9. To apply the hair, gather small portions of the wig's hair in about 8-inch lengths and cut in a straight line.  Keep that cut line in your fingers, apply glue along that edge and work the glue into the tips of the hair to bind it together. Set this piece aside to dry and continue cutting and gluing clumps of hair.  Some wigs can be very knotted but keep in mind that this will look great once it is applied and go ahead and cut right through knots or matted areas.  You will need about 5 or six lengths of hair for most heads.
  10. Apply a fairly wide glue strip along hairline on your sculpted head and place your lengths of hair TOWARD the face and neck as shown. This will give you a clean hairline once you pull the hair up to style it.  Wait a few minutes for the glue to set. 
     
  11. Tie a long piece of twine to the wire loop.  This will be your hanger so make sure it is longer than your hair. 
  12. Now it is time to style the hair. If you have fairly straight hair clumps (like the ones I have here) you can tease the hair for a fuller look. Now gather the hair up above the head and tie it to the twine hanger. Your shrunken head is complete and ready to hang!

Tuesday, July 15, 2014

Wizard Fest 2014

I spent Saturday at Country Village's Wizard Fest.  It is so close to where I live I couldn't resist going once again.  Country Village is such a beautiful location and the only outdoor venue I show my work at so far.  This event is mainly for children although witches and wizards of all ages do attend.  It is a fun break from the big art shows and I get to take my children with me to tend the booth and run our free raffle.  The Seattle area happens to be in the middle of an unseasonable heatwave so we were thankful for the shade of our tent and the sound of the large water fountain near our location.  I will share some photos of the day below.
 The Wizard's Magic Show brought the skills of Hogwarts to the Village and thrilled the budding students.  I'll tip my hat to this fabulous and funny wizard to managed to perform so graciously in his stunning robes in ninety-plus degree heat!

One of the great things about an outdoor venue is you get to meet lots of pets.  At a wizarding show people tend to have some unusual pets.  This giant iguana was content to ride on his owner's jacket or stroll confidently on his leash.  I also had some of the Village chickens wander into my booth as I was setting up- just missed getting a photo of one eye to eye with one of my sculptures!


Even the vendors came decked out is robes.  Who wouldn't want to shop this gentleman's store?


One of the main reasons I love this show is it gives me the chance to catch up with Dennis Brown.  He is a fine artist and adviser and I always enjoy his company.  I am lucky to have someone with such skills living so close.  This time we swapped pieces and this photo shows Dennis holding the piece I took home.  I have one of his borrowers and this pumpkin-headed guy is now sitting next to it.

So the work completed for the past twelve days of my Summer Challenge was dozens of baby house elves and creatures.  The remaining pieces will be added to my Etsy shop this week.  I am finally able to get back to preparing for Halloween and have some hard sculpts in the works of a witch, pumpkin man and mummy.
Check in for photos soon!

Thursday, July 3, 2014

Alice, Unicorns and the Midnight Hour

I am 10 days into my summer challenge already!  All in all I would have to say I am happy with my progress.  I managed to complete one sculpted Alice in Wonderland, a custom art doll and seven charms.  The one truly helpful factor is the sun being up so long.  I can easily deceive myself into feeling like it is 4pm instead of 9pm, at least for a little while.  It also helps to be motivated by what I am making.
Here is this week's group shot.


This is the first time I have done a little unicorn elf charm.  More of these are on the way largely because I committed to appearing at Wizard Fest again this year.  The show is tons of of fun and very child oriented so the charms are perfect for that show.  It is also a fun one for my daughters to attend with me.  If you are in the Seattle area come by Country Village on the 12th and say hello!

 
The challenges this week were scheduling.  Five doctor appointments, a plumbing mishap, relatives coming for a short stay and a day camp to juggle.  It was an eventful week but it was also a fun one.  It does help to know I am reporting in here every week to keep me plugging along into the wee hours and I am still curious to see what I can accomplish each week! For now, I will leave you with a photo of Alice and get on to planning the next few projects!
 

Monday, June 23, 2014

My Summer Challenge

My family is officially four days into summer break!  This is a welcome end to a crazy school/lessons/sports schedule and the beginning of summer fun.  It also means that my work hours go from being daylight to midnight if I am lucky.  If I were realistic I would dial down expectations and to do lists accordingly.  I am not that sort of person of course.  I like a challenge.  So what better thing to do than defy the laws of summer and challenge myself to not only keep my three girls busy and happy but to keep accomplishing actual, physical sculpture work every day.

 Madness! 
Now that is more like it.


The goal is to sculpt or paint or otherwise work on completing a piece.  This does not include computer work like marketing or blogging, shipping, paperwork, etc.  Those things generally get done because they must.  They have actual deadlines. Production of new things usually gets pushed down the list.  This is manageable when I have actual full work days, no so much on summer schedules.  I plan to document this experiment daily through my Instagram feed (griffinwyseinsta) with a #griffinwysemadness.  I will update the progress of the completed work and comments here, no doubt kicking myself for ever thinking this up and then being fool enough to commit publicly.  That being said, I may just get more done than I could imagine and blow my own mind with new skills and groundbreaking ideas ( I find it helps to stay positive).

  Wish me luck and Happy Summer! I am off to work!